Hardware Features Of 8051 54114o
This document was ed by and they confirmed that they have the permission to share it. If you are author or own the copyright of this book, please report to us by using this report form. Report 3i3n4
Overview 26281t
& View Hardware Features Of 8051 as PDF for free.
More details 6y5l6z
- Words: 3,953
- Pages: 52
HARDWARE FEATURES OF 8051 AND PROGRAMMING.
I/O port programming :
PORT 0 : PORT 0 occupies a total of 8 pins ( from pin number 32 to 39 ) It can be used for I/P or O/P . To use the pins of port zero as a both I/P or O/P port each pin must be connected externally to a 10k pull up resistor .
PORT 0 as I/P port :
In order to make PORT 0 as I/P port the port must be programmed by writing 1 to all the bits then these data is received from the port
If PORT 0 bits are reset then it can be used as O/P port.
Ex . MOV A , #FFH MOV P0 , A MOV A , P0
PORT 0 as O/P port :
Ex . MOV A , #00H MOV P0 , A
Dual role of PORT 0 :
P0 is also used for both address and data . P0 provides both data and address by using single ALE when ALE = 0 it provides data D0 to D7 and when ALE = 1 it provides address A0 to A7 .
P0RT 1:
Port 1 occupies total of 8 pin ( pin 1 to 8) It can be used as I/P or O/P port . These port does not need any pull up resistors since it already has pull up resistors internally.
Port 1 can be used as To make port 1 it must be programmed by writing 1 to Ex : o/p port by resetting all its bits. MOV A,# FFH
Ex :
port 1 .
MOV P1, A EX : BACK :MOV A,P1 MOV A,# FFH MOV P2,A SJMP BACK MOV P1, A
MOV A,P1
MOV A , #00H MOV P2 ,A
PORT 2 :
Port 2 occupies total of 8 pins ( pin no 21 to 28 ) . It can be used as I/P or O/P port just like P1 P2 does not need any pull up resistor since it already has pull up resistors internally. Upon reset port 2 can be used as o/p port .
PORT 2
PORT 2 as I/P port :
To make port 2 as I/P port it must be programmed by writing one to all its bits . Then data is received from that port and it is sent to port 1.
EX : MOV A, # FFH MOV P2 ,A MOV A,P2
PORT 2 as O/P port :
If PORT 2 bits are reset then it can be used as O/P port.
EX : MOV A , #00H MOV P2 ,A
Dual role of part 2:
P2 must be used along with port 0 to provide 16 bit address for the external memory i.e. from A8 to A15 Here P0 provide A0 to A7& P2 provide A8 to A15 .
PORT 3 :
Port 3 occupies total of 8 pins from 10 to 17. It can be used as I/P or O/P port . P3 does not need any pull up resistor as its already it is built inside . Upon reset port 3 is considered as O/P port .
PORT 3 as I/P port :
To make port 3 as I/P port it must be programmed by writing one to all its bits .
Ex : MOV A , #FFH MOV P3 , A MOV A , P3
If PORT 3 bits are reset then it can be used as O/P port. Ex : MOV A , #00H MOV P3 , A MOV P0,A
PORT 3 as O/P port :
DUAL ROLE OF PORT 3 :
T o make port 3 has additional function of providing an extremely important signals, they are,
P3.0 RXD P3.1 TXD P3.2 INTO P3.3 INTO P3.4 T0 P3.5 T1 P3.6 Wr P3.7 Rd
TIMER/COUNTER PROGRAMMING IN 8051 :
TMOD .
GATE 1
C/T 1
M1
M0
GATE 0
C/T 0
M1
M0
M1 0 0
M0 0 1
MODE 0 1
DESCRIPTION
1
0
2
8-BIT AUTO RELOAD
1
1
3
SPLIT MODE
13-BIT TIMER 16-BIT TIMER
Find the value for TMOD if we want to program timer 0 in MOD 2.
TIMER/COUNTER PROGRAMMING IN 8051 :
Indicate which mode and which timer are selected for each of the following .
1.MOV TMOD , #01H 2.MOV TMOD , #12H
ANSWER
1.MOD 1 of timer 0 is used 2.MOD 2 of timer 0 and MOD 1 of timer 1 are used .
CHARACTERISTICS OF MODE 1 PROGRAMMING :
It is a 16 bit timer values from 0000H to FFFFH can be loaded . After TH and TL are loaded timer is started by using instructions SETB TR0 or SETB TR1 When timer rolls over from FFFFH to 0000H it sets high on TF flag is equal to one timer will be stopped by using instruction CLR TR0 OR CLR TR1 In order to repeat the process TH and TL must be reloaded .
Steps to program timer in mode 1: 1) Load TMOD indicating which timer is used and which mode is used . 2) Load s TH and TL with initial count value . 3) Start the timer ( SETB TRO and SETB TR1 ). 4) Keep monitoring the timer flag TF by using instruction : JNB TF1 , target to see weather the TF flag is set . 5) Stop the timer by using instruction CLR TR0 or CLR TR1 If TF is set . 6) Clear TF flag for the next round by using instruction CLR TFO or CLR TF1. 7) Go back to step to load TH and TL again .
Program to illustrate mode 1 operation :
Write a program to create square wave of 50% duty cycle on the P1.5 bit . MOV TMOD , #01 HERE : MOV TL0 , #16H MOV TH0 , #FFH L P1.5
ACALL DELAY
SJMP HERE
DELAY : SETB TR0
AGAIN : JNB TF0 , AGAIN
CLR TR0
CLR TF0
RET
Timer 0 , Mode 1
Characteristics of mode 2 programming :
It is a 8 bit timer , Therefore only values of 00H to FFH to be loaded into the timers TH .
After TH is loaded with 8 bit value the 8051 gives a copy of it to TL . Then the timer must be started .
After the timer is started it starts to count down by Decrementing the TL .
When the TL value from FFH to 00 then TF is set . TL is reloaded automatically with the original .
To repeat the same process we must simply clear TF and let it go without any need by the programmer to reload the original value ( i.e. auto reloading )
Steps to program in mode 2 :
1)Load the TMOD value indicating which timer is to be used and timer mode is selected .
2)Load the TH with the initial count value .
3)Start the timer SETB TR0 .
4)Keep monitoring the timer flag ( TF ) with the
JNB TF0 , target instruction to see weather it is set .
5)Get out of loop when TF goes high .
6)Clear the TF flag for the next round .
7)Go back to step 4 , since mode 2 is auto reload .
Counter programming :
For the timer or counter when it is used as a timer the 8051 crystal is used as the source of the frequency When timer or counter is used as a counter ,it is a pulse outside the 8051 is used as the source of frequency . Timer in the counter mode C/T bit of TMOD will be one .So when C/T bit = 1 the counter counts up as pulse are fed from pin 14 and 15 these pins are called as T0 and T1. T0 and T1 pins belong to port 3 , When C/T = 1 and if counter 0 is used then pin P3.4 provides the clock pulses and counter counts up for each clock pulse coming from that pin. Similarly for counter one when C/T = 1,each clock pulse coming from pin P3.5 makes the counter to count up.
8051 INTERRUPTS
A single microcontroller can serve several devices . There are 2 ways to do that INTERRUPTS POLLING
Difference between Interrupts and polling :
INTERRUPT 1)If Interrupts are used
POLLING 1) Polling can monitor the
microcontroller can serve many device, can get attention
status of several devices and serve each of them
of microcontroller based on the priority assigned to it . This does not lead to the wastage of microcontroller time
as certain conditions are met . This leads to the wastage of mc time.
INTERRUPT 2)Interrupts can be assigned Priority .
3)interrupt method Microcontroller can ignore a device request for service
POLLING 2) In this method it is not possible to assign priority since it checks all devices in a round robin fashion . 3) This is not possible in polling .
Interrupt service routine.
For every Interrupt there must be an interrupt service routine (I S R ) . When an interrupt is invoked the microcontroller runs the I S R . For every interrupt there is a fixed location in memory that holds the address of its I S R The group of memory locations set aside to hold the address of I S R’S is called the interrupt vector table .
Steps in executing an interrupt :
Upon activation of an interrupt the microcontroller goes through the following steps.
It finishes the instruction it is executing and saves the address of the next instruction on the stack . It also saves the current status of all the interrupts internally . It jumps to a fixed location in memory called the interrupt vector table that holds the address of the I S R . The microcontroller gets the address of the I S R from the interrupt vector table and jumps to it . It starts to execute the interrupt service subroutine until it reaches the last instruction of the subroutine which is RETI ( Return from the interrupt ). Upon executing the RETI instruction , The microcontroller returns to the place where it was interrupted . First it gets the program counter ( P C ) address from the stack by popping the top two bytes of the stack into the P C . Then it starts to execute from that address .
Six Interrupts in the 8051 :
1. Reset : When Reset pin is activated the 8051 jumps to address location 0000 . Two interrupts are set aside for the timers . One for timer 0 and one for timer 1( TF0 & TFI) Two interrupts are set aside for external hardware interrupts . Pin no. 12(P3.2) and 13(P3.3) are for the external hardware interrupts INT0 and INT1 . Serial communication has a single interrupt that belongs to both receive and transfer .(TI &RI)
Interrupt vector table for the 8051 :
INTERRUPT RESET INT0 INT1 Timer 0 interrupt (TF0) Timer 1 interrupt (TF1) Serial comm. Interrupt (RI & TI)
ROM location 0000 0003 0013 000B 001B 0023
PIN 9 12 13 -
Enabling and disabling an Interrupt :
The interrupts must be enabled by the software in order for the microcontroller to respond to them .
There is a called IE (Interrupt enable) that is responsible for enabling and disabling the interrupts.
IE is a bit addressable .
EA
-
ET2 ES
ET1 EX1 ET0 EX0
EA
- ET2 ES
ET1 EX1 ET0 EX0
1.EA (D7) If EA = 0 , All interrupts are disabled . If EA = 1 , All interrupts are enabled.
2. D6 (IE6) not used .
3.ET2 (IE5) If ET2 = 0 , disables timer 2 overflow interrupt
If ET2 = 1 , enables timer 2 overflow interrupt 4.ES (IE4) If ES = 0 , disables serial port interrupt . If ES = 1 , enables serial port interrupt .
5.ET1 (IE3) Enables or disables timer 1 overflow interrupt .
6.EX1 (IE2) Enables or disables external interrupt 1.
7.ET0 (IE1) Enables or disables timer 0 overflow interrupt .
8. EXO (IE0) Enables or disables external interrupt 0 .
Steps in enabling an interrupt are :
1.Bit D7 of IE i.e. EA must be set to high to allow the reset of s to take effect .
2.If EA = 1 , interrupts are enabled and will respond to if the corresponding bits in IE are high .
3.If EA = 0 , no interrupts will be responded to , Even if the associated bits in IE is high .
Programming timer interrupts :
The timer flag (TF) is raised when the timer rolls over .
If the timer interrupt in the IE is enabled , Whenever the timer rolls over , TF is raised and microcontroller is interrupted and jumps to the interrupt vector table .
In this way the microcontroller can do other things until it is notified that the timer has rolled over .
Programming external hardware interrupts :
The 8051 has two external hardware interrupts they are INT0 and INT1 .
They are INT0 and INT1 .
They are located on pins P3.2 of port3 respectively .
They are enabled and disabled using the IE . There are two activation levels for the external hardware interrupts.
Level triggered
Edge triggered
Level Triggered Interrupt:In the level triggered mode , INTO & INT1 pins are
normally high.
If low signal is applied to them , it triggers the interrupt .
The low level signal at the INT pin must be removed before the execution of the last instruction of ISR i.e. RETI, otherwise another interrupt will be generated.
Edge triggered Interrupts:-
In edge triggered interrupts the external source must be held high for a least one machine cycle and then held low for at least one machine cycle . To make INTO & INT1 interrupts as edge triggered interrupts , we must program the bits of the TCON .
T F 1 T R 1 T F 0 T R 0 IE 1 07 IE 1 External interrupt one edge flag.
IT 1
IE 0
IT 0 00
set by U when external Interrupt ( H to L transition ) is detected. Cleared by U when interrupt processed.
IT 1 Interrupt 1 type control bit.
used .
IE 0 External interrupt 0 edge flag. Set by U when external interrupt (H to L transition) is detected.
Set or cleared by software to specify edge or level triggered external interrupt is
Cleared by U when interrupt is processed. IT 0 Interrupt 0 type control bit. used.
Set or cleared by software to specify edge / low level triggered external interrupt is
If IT0 & IT1 both are 0’s , means that the IT0 & INT1 pins are low level triggered . If both these bits are high , it means that INT0 & INT1 are edge triggered.
Interrupt Priority in the 8051
When 8051 is powered up , the priorities are assigned according as shown below
Priority Interrupt 6 TF2 5 RI & TI 4 TF1 3 INT 1 2 TF 0 1 INT 0 If interrupts INT 0 , TF 0 , & INT 1 are activated at the same time , then 8051 checks all five interrupts according to sequence . If any is activated it service it in sequence . Therefore when above three interrupts are activated , INT 0 is serviced first , then timer 0 ( TF 0) and finally INT1 is serviced.
Setting interrupt priority with the IP ( Interrupt Priority ) _
_
_
PS
Priority bit = 1 , assigns high priority
Priority bit = 0 , assigns low priority
PT1
PX1
PT0
PX0
Serial data communication in 8051
Computer transfer data in two ways parallel & serial . In parallel data transfer often whole byte is transferred to a device i.e. only few feet away. To transfer data to a device located many meters away then the serial method is used. In serial communication the data is sent one bit at a time
For serial communication to work the byte of data must be converted to serial bits using in parallel in serial out shift . The O/P of these shift can be transmitted over a single data line . At receiving there must be a serial in parallel out shift to receive serial data and pack them into a byte .
In serial data communication method each character is placed in between start and stop bit this is called framing .
In data framing all the bytes are packed between a start and a Stop stop bitbit. D6 D5 D4 D3 D2 D1 D0 start bit
The start bit is zero and stop bit is one .When there is no transfer of data the signal is one which is referred as mark .
The below figure shows framing the data 41H .
t
Baud rate :
The rate of data transfer in serial data communication is started at bps bits/sec and it is called baud rate . The below table will be what data should be stored in TH1 for various baud rates .
We are using crystal oscillator frequency of 8051 is equal to 11.0592Mhz.
Machine cycle frequency of 8051=11.0592 Mhz/12=921.6 K Hz.
921.6K Hz//32=28,800Hz.
BAUD RATE
TH1 in decimal
TH1 in hexadecimal
28,800/3=9600
-3
FD
28,800/6 =4800
-6
FA
28,800/12 =2400
-12
F4
28,800/24 =1200
-24
E8
SCON / Serial control :
SM 0 SM 1 SM 2 REN TB8 RB8 TI RI
T h e S C O N re g is te r is a 8 b it re g is te r u s e d to p ro g ra m s ta rt b it , s to p b it a n d d a ta b its .
SM0 and SM1 :
These 2 bit are serial port mode specifier these two determine the framing of data by specifying the number of bits between a start bit and the stop bit and the number of stop bits used are SM0
SM1
0
0
0
0
1
1
1
0
2
MODE
1 stop,1 start
In serial mode one for each byte of data to be transferred one start bit and one stop bit is used between one start bit and one stop bit only one byte of data can be transferred and received .
SM2 :
SM2 is a 5th bit of SCON if this bit is one then 8051 can use multiprocessing .
REN ( Receive enable ) :
REN bit is 4th bit of SCON when the REN bit is high it allows the 8051 to receive data on the RXD line . If REN is low 8051 cannot receive the data .
TB8 and RB8 :
These two bits are not widely used .
TI bit :
TI i e. transmit interrupt is bit D1 of the SCON , when the 8051 finishes the transfer of data it raises the TI flag to indicate that it is ready to transfer another byte .
The T1 bit is raised at the beginning of the stop bit .
RI : RI i.e. receive interrupt is the 0 bit of SCON .
When the 8051 receives data serially it gets rid of start and stop bits and places the byte in SBUF .
Then 8051 raises the RI flag bit to indicate that a byte have been received and it should be picked up before it is lost .
Steps for programming 8051 to transfer data serially :
1)The TMOD is loaded with the value 20H , Indicating the use of timer 1 in mode 2 to set the baud rate .
2)The TH1 is loaded with one of the values in the table below to set baud rate for serial data transfer .
If XTAL = 11.092Mhz , Timer = 1 , TH1 value for various baud rates
BAUD RATE
TH1( decimal )
TH1( Hexadecimal )
9600
-3
FD
4800
-6
FA
2400
-12
1200
-24
F4 E8
3)The SCON is loaded with the value 50H indicating serial mode 1 , Where an 8 bit data is formed with start and stop bits .
4)TR1 is set to 1 to start timer 1 .
5)TI is cleared by CLR TI instruction .
6)The character byte to be transferred serially is written into the SBUF .
7)The TI flag bit is monitored with the use of the instruction “ JNB TI, target “ to see if the character has been transferred completely .
8)To transfer the next character , go to step 5.
Programming 8051 to receive data serially :
1)The TMOD loaded with the value of 20H , Indicating the use of timer 1 in mode 2 to set baud rate .
2)The TH1 is loaded with the one of the value in the table below to set the baud rate for serial data transfer .
If XTAL = 11.09Mhz , Timer =1 , TH1 value for various baud rate .
BAUD RATE
TH1(Decimal )
TH1( Hexadecimal )
9600
-3
FD
4800
-6
FA
2400
-12
F4
1200
-24
E8
3)The SCON is loaded with value 50H indicating serial mode 1 where an 8 bit data is formed with start and stop bit .
4)TR1 is set to 1 to start timer 1 .
5)RI is cleared with the CLR RI instruction .
6)The RI flag bit is monitored with the use of the instruction JNB RI, target to see if an entire character have been received yet or not .
7)When RI is raised , SBUF has a byte . Its contents are moved into a safe pulse .
8)To receive next character go to step to 5 .
Business Unit or Product Name
Start and stop bits
© 2003 IBM Corporation
Related Documents 3h463d

Hardware Features Of 8051 54114o
August 2021 0
8051 242n2s
August 2022 0
Memory Organization Of 8051 2p521s
November 2019 80
History Of 8051 2g3k2y
November 2019 45
Presentation Of 8051 1p6s2s
April 2022 0
Addressing Modes Of 8051 5f621b
April 2022 0More Documents from "Manjunath Shimoga" 2y707
Hardware Features Of 8051 54114o
August 2021 0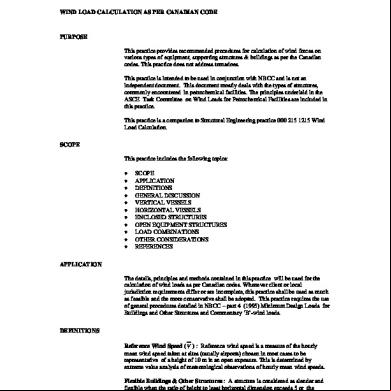
Wind Load Calculations_nbcc 2010.pdf 38g53
April 2020 27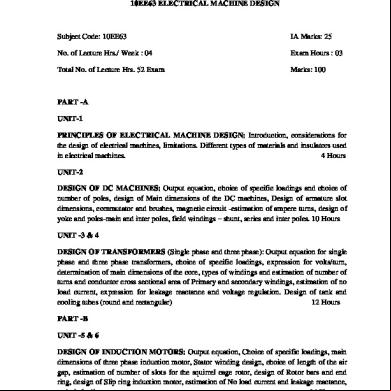
Eee-vi-electrical Machine Design [10ee63]-notes.pdf 5e6g6m
December 2019 70
Top 18 Database Projects Ideas For Students _ Programming Assignment Help, Java Assignment Help 304w2h
November 2019 57
Statement Problem Nsg 6v1a5w
December 2019 111