Kx-ns500 66u1v
This document was ed by and they confirmed that they have the permission to share it. If you are author or own the copyright of this book, please report to us by using this report form. Report 3i3n4
Overview 26281t
& View Kx-ns500 as PDF for free.
More details 6y5l6z
- Words: 9,564
- Pages:
Getting Started Hybrid IP-PBX Model No.
KX-NS500
Thank you for purchasing this Panasonic product. Please read this manual carefully before using this product and save this manual for future use. In particular, be sure to read "1.2 For Your Safety (Page 5)" before using this product. KX-NS500: PFMPR Software File Version 001.00000 or later.
Table of Contents
Table of Contents 1 Before Installation ....................................................................................3 1.1 1.2 1.3
Outline ................................................................................................................................4 For Your Safety .................................................................................................................5 Unpacking ..........................................................................................................................7
2 Installation ................................................................................................9 2.1 2.2 2.3 2.4 2.4.1 2.4.2 2.5
Opening/Closing the Top Cover ....................................................................................10 Installing DSP Cards .......................................................................................................12 Frame Earth Connection ................................................................................................14 LAN Connection ..............................................................................................................14 LAN Connection for the Main Unit ..................................................................................14 LAN Connections for IP Telephones ..............................................................................16 Connecting Extension ....................................................................................................18
3 Before Programming .............................................................................19 3.1 3.2 3.3
Starting the KX-NS500 ....................................................................................................20 PC Connection ................................................................................................................23 Starting Web Maintenance Console ..............................................................................24
4 Programming ..........................................................................................27 4.1 4.1.1 4.1.2 4.1.3 4.2 4.3 4.3.1 4.3.2
Programming the PBX ....................................................................................................28 Easy Setup Wizard .........................................................................................................28 Installing the Virtual IP Cards to the PBX .......................................................................33 Installing Additional Activation Keys ...............................................................................33 Programming SIP Trunks ...............................................................................................35 Asg Networking Information to IP Telephones ..................................................37 Asg IP Addressing Information .............................................................................37 ing IP Telephones .............................................................................................51
5 Confirming the Connection ...................................................................57 5.1
2
Making and Receiving Calls ...........................................................................................58
Getting Started
Section 1 Before Installation
Getting Started
3
1.1 Outline
1.1 Outline This manual provides basic information about starting the PBX and using IP telephones. Note
• •
In this manual, the suffix of each model number (e.g., KX-NS500NE) is omitted unless necessary. In this manual, are defined as follows: IP-PT IP Proprietary Telephone SIP extension Extensions of the PBX which use Session Initiation Protocol for communication. SIP phone KX-UT series SIP phone IP conferencing phone (e.g., KX-NT700) Third party SIP phone (SIP hardphones/SIP softphones)
About the Other Manuals Manual Provides operating instructions for end s using IP-PTs, SIP phones, SLTs, PSs, or DSS Consoles.
Installation Manual Provides instructions for installing the hardware and maintenance of the PBX.
Feature Guide Describes all basic, optional and programmable features of the PBX.
PC Programming Manual Provides step-by-step instructions for performing system programming using a PC.
PT Programming Manual Provides step-by-step instructions for performing system programming using a PT.
Open Source Software This product uses Open Source Software. For details, click the Information button in Web Maintenance Console.
4
Getting Started
1.2 For Your Safety
1.2 For Your Safety To prevent personal injury and/or damage to property, be sure to observe the following safety precautions. The following symbols classify and describe the level of hazard and injury caused when this unit is operated or handled improperly.
WARNING
This notice means that misuse could result in death or serious injury.
CAUTION
This notice means that misuse could result in injury or damage to property.
The following types of symbols are used to classify and describe the type of instructions to be observed. This symbol is used to alert s to a specific operating procedure that must not be performed.
This symbol is used to alert s to a specific operating procedure that must be followed in order to operate the unit safely.
Getting Started
5
1.2 For Your Safety
WARNING
• • •
Proper earthing (connection to earth) is very important to reduce the risk to the of electrocution or to protect the PBX from the bad effects of external noise in the case of a lightning strike. The earthing wire of the AC cable has an effect against external noise and lightning strikes, but it may not be enough to protect the PBX and to ensure electromagnetic compatibility. A permanent connection between earth and the earth terminal of the PBX must be made. Make sure that the AC outlet is properly earthed, then securely connect the 3-pin AC plug including the earthed pin.
CAUTION
• •
• • • • • • •
When installing or removing the optional service cards, do not put pressure on any parts of the mother board. Doing so may result in damage to the PBX. Once you have started the PBX, if you unplug the PBX, do not initialise it again as described in "System Initialisation Procedure". Otherwise, your programmed data will be cleared.
When opening the top cover, the power switch must be turned off. For safety reasons, close the top cover and tighten the screws before operating the PBX. For earthing wire, green-and-yellow insulation is required, and the cross-sectional area of the conductor must be more than 0.75 mm2 or 18 AWG. Use only the AC power cord included with the PBX. Before touching the product (PBX, cards, etc.), discharge static electricity by touching ground or wearing an earthing strap. Failure to do so may cause the PBX to malfunction due to static electricity. When installing or removing the optional service cards, the power switch must be turned off. The power supply cord is used as the main disconnect device. Ensure that the AC outlet is located near the equipment and is easily accessible.
WARNING This is a class A product. In a domestic environment this product may cause radio interference in which case the may be required to take adequate measures.
6
Getting Started
1.3 Unpacking
1.3 Unpacking Check the package contents. KX-NS500 Main Unit ´ 1 CD-ROM*1 (including manuals, etc.) ´ 1 AC power cord*2 Hook clip 19-inch rack attachment bracket x 2 Screw x 6 (For 19 inch rack) Screw x 3 (For Wall Mounting) Washer x 3 (For Wall Mounting) *1 *2
The number of included CD-ROMs varies according to the country/area. The KX-NS500LA is supplied with 2 types of AC power cord. Please use whichever is appropriate for the country/area.
KX-NS520 Expansion unit CD-ROM(s)*1 AC power cord*2 Hook clip Ferrite core x 2 19-inch rack attachment bracket x 2 Screw x 6 (For 19 inch rack) Screw x 3 (For Wall Mounting) Washer x 3 (For Wall Mounting) *1 *2
The number of included CD-ROMs varies according to the country/area. The KX-NS520LA is supplied with 2 types of AC power cord. Please use whichever is appropriate for the country/area.
Necessary items (not supplied): • • • •
Earthing wire for PBX earth connection. Ethernet straight cables*1 for the LAN and PC connections. RJ45 connectors for the LAN and PC connections by Ethernet straight cables. Switching hubs and routers for VoIP network configuration.
*1
The cables should be 10BASE-T/100BASE-TX CAT 5 (Category 5) or higher, or 1000BASE-T CAT 5e (Enhanced Category 5) or higher.
Getting Started
7
1.3 Unpacking
8
Getting Started
Section 2 Installation
Getting Started
9
2.1 Opening/Closing the Top Cover
2.1 Opening/Closing the Top Cover Opening the Top Cover KX-NS500/KX-NS520
CAUTION When opening the top cover, the power switch must be turned off.
1. Confirm that the power switch is turned off and pull the power cable.
Power Switch
Note In order to turn off the PBX’s power, a system shutdown using Web Maintenance Console must first be performed. For details, refer to "5.4 System Control—System Shutdown" in the PC Programming Manual.
2. Turn the screws anticlockwise to loosen.
10
Getting Started
2.1 Opening/Closing the Top Cover
3. Slide the top cover then lift it off.
Closing the Top Cover 1. Place the top cover onto the PBX. Then slide the top cover until it closes properly.
2. Turn the screws clockwise to tighten.
CAUTION For safety reasons, close the top cover and tighten the screws before operating the PBX.
Getting Started
11
2.2 Installing DSP Cards
2.2 Installing DSP Cards CAUTION • • •
Before touching the product (PBX, cards, etc.), discharge static electricity by touching ground or wearing an earthing strap. Failure to do so may cause the PBX to malfunction due to static electricity. When installing or removing the optional service cards, the power switch must be turned off. When installing or removing the optional service cards, do not put pressure on any parts of the mother board. Doing so may result in damage to the PBX.
Note Make sure the AC power cord is not connected to the AC inlet of the PBX. A DSP card is a digital signal processor card with DSP resources that can be used for VoIP calls, conferences, the Unified Messaging feature, and the DISA/OGM feature. The DSP card is compliant with ITU-T G. 729A and G.711 codec methods.
12
Getting Started
2.2 Installing DSP Cards
Depending on the amount of your DSP resource needs, a DSP S, DSP M, or DSP L card can be installed. In order to use VoIP features with the PBX, a DSP S, DSP M, or DSP L card must be installed in the DSP card slot.
Note
• • •
The DSP Resource Advisor can be used to calculate DSP resource usage easily. For details, refer to "9.37.1.1 PBX Configuration—[1-5-1] Configuration—DSP Resource—Setting—DSP Resource Advisor" in the PC Programming Manual. For details about the number of resources provided by each type of DSP card, refer to "4.3.3 DSP S Card (KX-NS5110), DSP M Card (KX-NS5111), DSP L Card (KX-NS5112)" in the Installation Manual. For information about installing other optional service cards, refer to the Installation Manual.
Getting Started
13
2.4.1 LAN Connection for the Main Unit
2.3 Frame Earth Connection KX-NS500/KX-NS520
1. 2. 3. 4.
Loosen the screw. Insert an earthing wire (-supplied). Tighten the screw. Connect the earthing wire to earth.
Screw Earthing wire To earth
WARNING • •
Proper earthing (connection to earth) is very important to reduce the risk to the of electrocution or to protect the PBX from the bad effects of external noise in the case of a lightning strike. The earthing wire of the AC cable has an effect against external noise and lightning strikes, but it may not be enough to protect the PBX and to ensure electromagnetic compatibility. A permanent connection between earth and the earth terminal of the PBX must be made.
CAUTION For earthing wire, green-and-yellow insulation is required, and the cross-sectional area of the conductor must be more than 0.75 mm2 or 18 AWG. Notice Be sure to comply with applicable local regulations (e.g., laws, guidelines).
2.4 LAN Connection 2.4.1 LAN Connection for the Main Unit Connecting the Main Unit to the LAN When the PBX is connected to the LAN for the first time, you must assign IP addressing information to the PBX. Refer to "4.1 Programming the PBX" for instructions. Note Make sure to set the port of the switching hub that connects to the PBX to operate under "Auto Negotiation" mode.
Connecting the PBX to a Switching Hub 1. Connect the cable to the LAN port of the PBX.
14
Getting Started
2.4.1 LAN Connection for the Main Unit
2. Connect the other end of the cable to the switching hub.
IP Softphone, CA Client PC CTI Server
PC LAN Port Switching Hub Ethernet Cable
IP-PT
IP-CS
SIP-CS
SIP Phone
Trunk Adaptor
Connection for 10BASE-T/100BASE-TX Switching Hub PBX (LAN Port) Signal Name Pin No.
Pin No. Signal Name
TX+
1
1
RX+
TX-
2
2
RX-
RX+
3
3
TX+
RX-
6
6
TX-
Getting Started
15
2.4.2 LAN Connections for IP Telephones
2.4.2 LAN Connections for IP Telephones When an IP telephone is connected to the LAN and power is supplied for the first time, you will be prompted to set network parameters. The network parameters must be set for the IP telephone before it can be used. Refer to "4.3 Asg Networking Information to IP Telephones" for instructions.
Connecting an IP Telephone to a Switching Hub When connecting an IP telephone to the LAN, connect it to a switching hub. Note Since an IP softphone is installed and operates on a PC, the PC must be connected to the LAN to use the IP softphone on the network. The diagram below is for connecting an IP-PT to a switching hub. For SIP phones, refer to the documentation of your SIP phone. Example: KX-NT346 To a Switching Hub Ethernet Straight Cable
16
Getting Started
2.4.2 LAN Connections for IP Telephones
Connecting an AC Adaptor to an IP Telephone IP-PTs and some SIP phones comply with the IEEE 802.3af Power-over-Ethernet (PoE) standard. If PoE is available on your network, these IP telephones can receive the necessary power supply from the network through the network cable. In this case, no AC adaptor is needed for the IP telephones. However, if PoE is not available, you will need to connect an AC adaptor to the IP telephone. Note Use only the specified type of AC adaptor for each IP telephone. For details, refer to the documentation of your IP telephone. Example: KX-NT346 To Wall Socket AC Adaptor Cord
Getting Started
17
2.5 Connecting Extension
2.5 Connecting Extension
To DPT
To SLT
Regarding of the PIN assignment of RJ45(PBX side), refer to the Installation Manual. Example: KX-DT300 Series DPT
Pin Assignments
DPT and DSS Console TO MAIN UNIT / PABX H L
H L
KX-T7000 Series SLT
TR
18
Getting Started
Section 3 Before Programming
Getting Started
19
3.1 Starting the KX-NS500
3.1 Starting the KX-NS500 WARNING Make sure that the AC outlet is properly earthed, then securely connect the 3-pin AC plug including the earthed pin.
CAUTION • • • •
Use only the AC power cord included with the PBX. Before touching the product (PBX, cards, etc.), discharge static electricity by touching ground or wearing an earthing strap. Failure to do so may cause the PBX to malfunction due to static electricity. Once you have started the PBX, if you unplug the PBX, do not initialise it again as described in "System Initialisation Procedure". Otherwise, your programmed data will be cleared. The power supply cord is used as the main disconnect device. Ensure that the AC outlet is located near the equipment and is easily accessible.
Note An Uninterruptible Power Supply (UPS) can be connected to the PBX. A UPS provides temporal power to the PBX in the event of power failure.
Installing the Hook Clip for the AC Power Cord 1. Insert the hook clip into the hook clip hole.
Note Use only the hook clip included with the PBX.
20
Getting Started
3.1 Starting the KX-NS500
Connecting the AC Power Cord 1. Plug the AC power cord into the PBX and the cord through the hook clip as indicated. Push the hook clip in the direction of the arrow until it clicks. Note For safety reasons, do not stretch or pinch the AC power cord.
To UPS
2. Plug the other end of the cord into an AC outlet.
System Initialisation Procedure 1. Slide the System Mode Switch to the "SYSTEM INITIALIZE" position.
STATUS Indicator
System Mode Switch
2. Turn on the power switch of the PBX. The STATUS indicator will flash green.
Getting Started
21
3.1 Starting the KX-NS500
3. While the STATUS indicator is flashing green, slide the System Mode Switch back to the "NORMAL" position. Depending on the configuration, initialisation takes about 2.5 minutes. If successfully executed, the STATUS indicator will stop flashing and remain lit up. Note For details about LED indications, refer to "4.3.1 Mother Board" in the Installation Manual. All data, except for system prompts and activation key files, will be erased. Data that is erased includes Unified Messaging data, call logs, etc. The settings for the PBX as well as all optional service cards will be initialised to their default values.
22
Getting Started
3.2 PC Connection
3.2 PC Connection Web Maintenance Console serves as an overall system programming tool for the PBX. The Web Maintenance Console’s Easy Setup Wizard lets you easily configure the PBX to apply installation settings to enable communication on an IP network. To programme the PBX, connect it to the PC via the LAN port. When connecting the PBX via a Virtual Private Network or the Internet, refer to "5.2 PC Connection" in the Installation Manual.
Connection via LAN
LAN
PC
LAN Port Switching Hub
Note For details about LAN connection, refer to "4.11.1 LAN Connection for the Main Unit" in the Installation Manual.
Getting Started
23
3.3 Starting Web Maintenance Console
3.3 Starting Web Maintenance Console System Requirements For the system requirements of the PC (operating system, hardware specifications, ed browsers etc.), refer to "5.3 Starting Web Maintenance Console" in the Installation Manual.
Connecting to Web Maintenance Console Note The contents and design of the software are subject to change without notice.
1. Connect the PC to the PBX: • Connect the PBX to a network with the LAN port and access the PBX from a PC in your LAN. For details, refer to "4.11.1 LAN Connection for the Main Unit" in the Installation Manual.
2. Access Web Maintenance Console: LAN Connection: Launch your Web browser and input the IP address of the PBX followed by the Web Maintenance Console port number into the address bar. The input method will differ according to the PC’s connection to the PBX. The default IP address for the LAN port of the PBX is 192.168.0.101, and the default Web Maintenance Console port number is 80. Therefore the address to enter to connect to the PBX for the first time will be as follows (enter the address exactly as shown): http://192.168.0.101 Note The default subnet mask for the LAN port is 255.255.255.0.
3. The Web Maintenance Console screen is displayed. with the Installer level name and the default Installer level to launch the Easy Setup Wizard. For details about the Easy Setup Wizard, see "4.1.1 Easy Setup Wizard".
Using Web Maintenance Console in Off-line Mode You can connect a PC to the PBX to programme the PBX using Web Maintenance Console (On-line mode), or you can programme the PBX without connecting the PC to the PBX (Off-line mode). Off-line mode programming is performed using the Off-line version of Web Maintenance Console, which you install on your PC. The changes made during Off-line mode are saved as local data on the PC, and then later ed to the PBX. The following procedures outline how to install the Web Maintenance Console for Off-line mode programming.
Installation Note
• •
• •
24
Be sure to install the latest version of KX-NS500 Off-line WEB-Maintenance Console. Before beginning the installation of Off-line Web Maintenance Console, the following software must be installed on the PC: – Microsoft .NET Framework 2.0 – Microsoft .NET Framework 4 This software can be ed from Microsoft’s online Centre. To install or uninstall the software on a PC running Windows XP Professional, you must be logged in as a in either the "s" or "Power s" group. To install or uninstall the software on a PC running Windows Vista Business, Windows 7, Windows 7 Professional, Windows 8, Windows 8 Professional, you must be logged in as a in the "s" group.
Getting Started
3.3 Starting Web Maintenance Console
1. Copy the KX-NS500 Off-line WEB-Maintenance Console setup file to your PC. 2. Double-click the setup file to run the installer. 3. Follow the on-screen instructions provided by the installation wizard. Note For information about programming the PBX in Off-line mode, refer to the PC Programming Manual.
Getting Started
25
3.3 Starting Web Maintenance Console
26
Getting Started
Section 4 Programming
Getting Started
27
4.1.1 Easy Setup Wizard
4.1 Programming the PBX 4.1.1 Easy Setup Wizard In the Easy Setup Wizard, you will set up the mandatory settings required for the PBX. When you to Web Maintenance Console for a PBX that is in its initialised, factory default state, the Easy Setup Wizard for that PBX will launch automatically. You must using the Installer level name and . – The Installer level name is "INSTALLER". – The default Installer level is "1234". 1.
After Easy Setup Wizard launches, the Easy Setup Wizard screen appears: a. In WebMC Language Setting, select a language from the drop-down list. b. In Location Setting, select a location from drop-down list. c. In Setting, enter a for the Installer level . In Re-enter, enter the same . d. Click Start Setup Wizard. Note If the location is changed from its default value, a notice about restarting the PBX is displayed. Click OK to restart the PBX. After the PBX restarts, start Web Maintenance Console again (refer to "Connecting to Web Maintenance Console" in "3.3 Starting Web Maintenance Console"). When you start the Easy Setup Wizard again, you will start from step 1, below.
2.
In the Date & Time Settings:
a. Select a time zone from the drop-down list. b. Click the Local Time box, and then select the date and time from the menu.
c. In Automatic Time Adjustment, enter information as necessary.
d. In Daylight Saving, select the appropriate option. e. Click Next.
28
Getting Started
4.1.1 Easy Setup Wizard
3.
In the Numbering settings: a. In Feature Number, select the appropriate option. b. In CO Access/Operator Number, select the appropriate options. c. Select one of the following options for Select the default value of numbering plan: – 3 digits Extension Number – 4 digits Extension Number d. Click Next. Note Depending on the value selected above, the numbering plan of the PBX will vary as follows. Select this value with care.
4.
In the Manager/Operator settings:
a. Select an extension number for the manager from the drop-down list.
b. Select an extension number for the operator from the drop-down list.
c. Click Next. 5.
In the Trunk settings: a. In CO Dialing Mode, select the appropriate option. b. In Selection for PRI30/E1, select the appropriate option. c. Select an option for Incoming Call Distribution Group. You can select "Yes" or "No". Refer to the information on this screen for details. d. Click Next.
Getting Started
29
4.1.1 Easy Setup Wizard
6.
In the LAN settings: The IP addresses for the PBX, DNS server, and DSP cards can be assigned automatically through a DH server or entered manually. When using a DH server: a. Select Obtain an IP address automatically. b. Select Obtain DNS server address automatically. c. Select Obtain DSP IP address automatically. Notice The boxes will turn grey and the IP address information will be assigned automatically. Write down the address information assigned to the PBX for future reference.
d. Click Next. When not using a DH server: a. Select Use the following IP address. b. Enter an IP address*1, subnet mask*2, and default gateway*1. (You may not need to specify the default gateway, depending on your network configuration.) c. Select Use the following DNS server address. d. Enter the preferred and alternative DNS IP addresses*1. e. Select Use the following DSP IP address. f. Enter up to 2 IP addresses*1 for each installed DSP card. g. Click Next. *1 *2
30
Getting Started
Valid IP address range: "1.0.0.1" to "223.255.255.254" Valid subnet mask address range: "0–255.0–255.0–255.0–255" (except "0.0.0.0" and "255.255.255.255")
4.1.1 Easy Setup Wizard
7.
In the VoIP (Ext) settings: In Number of IP Extensions: a. In IP-PT(NT), specify the number of IP-PT extensions. b. In UT/UDT, specify the number of UT/UDT extensions. c. In SIP-Phone, specify the number of SIP extensions. Note You can confirm the required number of virtual IP extension cards, total IP extensions and total virtual IP extension cards.
d. In IP Terminal Registration Mode, select one of the following options: • Manual: Manually IP terminal information. • Full Automatic: Automatically IP terminal information. • Extension Number Input: Automatically IP terminal information except the extension number. The extension number can then be ed from the IP telephone manually. Note
•
•
The Full Automatic and Extension Number Input registration modes may not be available for certain types of IP terminals. In such cases, select Manual as the registration mode. For more information about the IP terminal registration modes, refer to "4.3.2 ing IP Telephones".
e. In DH Server, select either Disable or Enable. f. If you select Enable in DH Server, enter valid settings for the automatic assignment of IP addresses. g. Click Finish. 8.
Follow the prompts of the Easy Setup Wizard. If LAN settings were changed from their default values in step 6, you will be prompted to restart the PBX after the Easy Setup Wizard is complete. Click OK to restart the PBX. The screen will be displayed. Click Skip to finish the Easy Setup Wizard and continue the configuration from the home screen without restarting the PBX. Notice If you select Skip, restart the PBX after completing the settings.
Getting Started
31
4.1.1 Easy Setup Wizard
9.
with the Installer level using the entered during Easy Setup Wizard.The Home Screen is displayed. You may now begin programming the PBX.
Notice If an external DH server is in use, it must be able to use the "client identifier" option specified by RFC 213.
32
Getting Started
4.1.3 Installing Additional Activation Keys
4.1.2 Installing the Virtual IP Cards to the PBX 1.
Click Setup ® PBX Configuration ® Configuration ® Slot.
2.
Place the mouse cursor over the Virtual Slot, and in the menu that appears, click Select Shelf.
3.
Click on the name of the virtual card to install in the list on the right. An image of the virtual card will be displayed to the left of the list, and information about the card will be shown below.
4.
Click and drag the image of the virtual card to the free virtual slot it is to be installed in, and release it. The virtual card will move into the virtual slot space.
5.
Click OK to confirm.
4.1.3 Installing Additional Activation Keys When the number of preinstalled activation keys is not enough for the desired configuration or when you wish to use enhanced features, additional activation keys in the form of activation key files can be installed using Web Maintenance Console.
Activation Key Code and Key Management System To obtain additional activation keys, you need to purchase the appropriate activation key codes and access the Key Management System. You can the activation keys as an activation key file from the Key Management System. To the activation keys, enter the MPR ID number shown on the back of the main unit, and activation key number and registration ID provided on each activation key code. Note For information about the types of activation keys, refer to "3.1 Information about the Activation Keys" in the Installation Manual.
Installing the Activation Key Files 1. to Web Maintenance Console using the Installer level . 2. Click Maintenance ® Utility ® Activation Key Installation. 3. 4. 5. 6.
Activation Key Installation window will be displayed. Click Browse and specify the directory where the activation key files are stored, and click Open. A list of activation key files stored in the specified directory is displayed. Check the boxes next to the activation keys to install to the PBX, and click Install. When installation is complete, the message, "The activation key has been installed and activated successfully!" is displayed. Click OK.
Notice The activation key file can only be installed in the PBX with the MPR ID number entered when the activation key file was ed. The activation key file cannot be reissued unless the mother board crashes.
Getting Started
33
4.1.3 Installing Additional Activation Keys
Note You can click the provided link to directly access activation key information and programme the number of activated IP trunks and IP softphones.
Configuration of the Activation Keys Depending on your configuration, it may be necessary to programme the number of provided IP Trunk channels to be used for H.323 trunks. By default, all of the provided IP Trunk channels will be used for SIP trunks. Similarly, you can programme how many IP softphone(s) can be used through the IP Softphone/IP Proprietary Telephone activation key. By default, only IP softphone(s) can be used through the IP Softphone/IP Proprietary Telephone activation key. 1.
a. Click Setup ® PBX Configuration ® Configuration ® Slot.
b. Click Activation Key. 2.
a. In Number of activated IP-GW, type the number of IP Trunk channels to be used for H.323 trunks. Note If you have changed the value for Number of activated IP-GW, you must click Execute to restart the V-IPGW cards for the change to take effect.
b. In Number of activated IP-Softphone, type the number of IP softphones to be used through the IP Softphone/IP Proprietary Telephone activation key. 3.
Click OK.
Note For a detailed explanation about activation keys, refer to "3.1 Information about the Activation Keys" in the Installation Manual.
34
Getting Started
4.2 Programming SIP Trunks
4.2 Programming SIP Trunks The Virtual 16-Channel SIP Trunk Card (V-SIPGW16) is a virtual trunk card which is designed to be easily integrated into an Internet Telephony Service provided by an ITSP (Internet Telephony Service Provider). For information about SIP trunks, refer to "8.3 SIP Trunks" in the Installation Manual.
Accessing Port Properties 1.
Click Setup ® PBX Configuration ® Configuration ® Slot.
2.
Place the mouse cursor over the Virtual Slot, and in the menu that appears, click Select Shelf.
3.
Move the mouse pointer over the V-SIPGW16 card to display the menu of options, and then click Ous.
4.
Move the mouse pointer over the V-SIPGW16 card to display the menu of options again, and then click Port Property.
Programming Port Properties Automatic Programming Some of the parameters can be automatically programmed by selecting the desired SIP provider for each virtual SIP gateway port. Available SIP providers can be selected, and a different SIP provider can be assigned to each virtual SIP gateway port. Note It is necessary to import a SIP provider list file (comma-separated value [CSV] file) in advance to use the automatic programming feature. Follow the steps below to configure a SIP provider. 1. Click Select Provider. A dialogue box will appear. Available virtual SIP gateway port numbers are displayed in the list. 2. From the Provider drop-down list, select the desired SIP provider. Note If the desired SIP provider is not shown in the drop-down list, it is necessary to programme the desired parameters manually. For information about the manual programming procedure, refer to "Manual Programming" below.
3. Highlight the desired port numbers or click Select All to select all the virtual SIP gateway port numbers to be assigned to the SIP provider selected in step 2. 4. Click Execute. Appropriate setting values designated by the SIP provider will be set in the parameters for the virtual SIP gateway ports.
Manual Programming Manual programming is compulsory for the following parameters: Follow the steps below to programme the parameters which are not automatically programmed by selecting a provider. 1. Click the desired tab. 2. Enter information or select settings from the drop-down list for each parameter.
Getting Started
35
4.2 Programming SIP Trunks
Parameters that Require Manual Programming Manual programming is compulsory for the following parameters: • Name: Specifies the name (SIP ) provided by the SIP provider. (Max. 64 characters) • Authentication ID: Specifies the authentication ID required for registration with the SIP server. (Max. 64 characters) • Authentication : Specifies the authentication used for registration with the SIP provider. (Max. 32 characters) Follow the steps below to programme these 3 parameters. 1.
Click an tab.
2.
In the Name column, enter the name provided by the SIP provider.
3.
In the Authentication ID column, enter the authentication ID required for registration with the SIP server.
4.
In the Authentication column, the authentication used for registration with the SIP provider.
5.
Click OK.
Adding Settings to Provider Profiles Follow the steps below to add the settings to provider profiles. 1.
Click Add Provider. A dialogue box will appear. Available virtual SIP gateway port numbers are displayed in the list.
2.
Highlight the desired port numbers or click Select All to select all the virtual SIP gateway port numbers to add the settings to provider profiles.
3.
Click Execute.
Note For more details about SIP gateway port settings, refer to the PC Programming Manual.
36
Getting Started
4.3.1 Asg IP Addressing Information
4.3 Asg Networking Information to IP Telephones 4.3.1 Asg IP Addressing Information The IP address of an IP telephone, the subnet mask address, the default gateway address, and the PBX’s IP address must be assigned to the IP telephone before it can be used on the network. These IP addressing information can be assigned in the following ways;
For IP-PTs •
Using a DH server (DH Server feature or an external DH server) when the IP-PT is on the same LAN as the PBX The DH server automatically assigns the IP address of the IP-PT, the subnet mask address, and the default gateway address to the IP-PT. The PBX’s IP address can also be assigned automatically to the IP-PT in the process of being ed to the PBX. For details about ing the IP-PT, refer to "4.3.2 ing IP Telephones". Note For information about the DH Server feature, refer to "8.1.2 DH (Dynamic Host Configuration Protocol) Server" in the Installation Manual.
•
Using a DH server (DH Server feature or an external DH server) when the IP-PT is on a remote office LAN While the DH server automatically assigns the IP address of the IP-PT, the subnet mask address, and the default gateway address to the IP-PT, the PBX’s IP address must be assigned manually. Follow the procedure below to assign the PBX’s IP address. Note
•
• • •
By asg the PBX’s IP address to one IP-PT, it is possible to assign the PBX’s IP address to other IP-PTs or IP Cell Station Units (IP-CSs) on the same LAN through system programming. For details, refer to "9.14 PBX Configuration—[1-1] Configuration—Slot—V-IPEXT—Port Property—Option— Announce Mode" in the PC Programming Manual. IP-PTs can only receive IP addressing information from a DH server on its own LAN. Therefore, when IP-PTs are located on several LANs, a DH server is required on each LAN. Since the default setting of the DH client function is enabled for IP-PTs, simply connect the IP-PTs to the LAN to use the DH server. For KX-NT511 s Since there is no PROGRAM button on a KX-NT511, press flexible button 1, 2, or 3 instead. Also, there is no Navigator key either. To select items on the LCD, use flexible button 1 for left-arrow operation and flexible button 3 for right-arrow operation.
Getting Started
37
4.3.1 Asg IP Addressing Information
KX-NT300 series (except KX-NT321) and KX-NT500 series (except KX-NT511 and KX-NT551) To start programming SETUP
Supply power to the IP-PT.
Press "SETUP" when it is displayed.
To enter the IP address of the PBX For KX-NT300 series: Software version 2.00 or later only For KX-NT500 series: Software version 1.00 or later only
ENTER
Select "PBX".
Select "PBX IP Address".
ENTER
Select "Primary PBX".
PBX IP Address ENTER
ENTER
To enter the IP address of the Secondary PBX (optional for KX-NT300 series [Software version 2.00 or later only] and KX-NT500 series [Software version 1.00 or later only])
PBX IP Address Select "Secondary PBX".
ENTER
ENTER
To end programming STORE
Return to the Menu screen.
The IP-PT will reboot and can then be ed to the PBX.
Press "STORE".
Note The illustrations may differ from the buttons on your telephone.
38
Getting Started
4.3.1 Asg IP Addressing Information
KX-NT321/KX-NT511/KX-NT551 To start programming Supply power to the IP-PT. Press PROGRAM while "Searching" is displayed.
To enter the IP address of the PBX
Select "PBX".
Press SP-PHONE.
Select "PBX IP Address".
Press SP-PHONE.
Select "Primary PBX".
PBX IP Address Press SP-PHONE.
Press SP-PHONE.
To enter the IP address of the Secondary PBX (If required)
PBX IP Address Select "Secondary PBX".
Press SP-PHONE.
Press SP-PHONE.
Press HOLD twice to return to the Menu screen.
To end programming The IP-PT will reboot and can then be ed to the PBX. Press STORE.
Note
• •
For KX-NT511 s For details about operating the PROGRAM button and other buttons, refer to "For IP-PTs" in "4.3.1 Asg IP Addressing Information". To confirm the connection to the secondary PBX after asg IP addressing information, (1) turn the IP-PT’s power off, and (2) hold the STORE button and 2 key while turning the power on.
Getting Started
39
4.3.1 Asg IP Addressing Information
KX-NT265 (Software version 2.00 or later only) To start programming PROG.
Supply power to the IP-PT. Press PROGRAM while "Searching" is displayed.
To enter the IP address of the PBX VOL
PBX IP Address Press VOLUME to select "PBX".
Press SP-PHONE twice.
HOLD
Press SP-PHONE.
Press HOLD to return to the Menu screen.
To end programming The IP-PT will reboot and can then be ed to the PBX. Press STORE.
•
40
Not using a DH server (DH Server feature or an external DH server) when the IP-PT is on the same LAN as the PBX Only the PBX’s IP address can be assigned automatically to the IP-PT in the process of being ed to the PBX. For details about ing the IP-PT, refer to "4.3.2 ing IP Telephones". Follow the procedure below to assign the IP address of the IP-PT, the subnet mask address, and the default gateway address manually.
Getting Started
4.3.1 Asg IP Addressing Information
KX-NT300 series (except KX-NT321) and KX-NT500 series (except KX-NT511 and KX-NT551) To start programming SETUP
Supply power to the IP-PT.
Press "SETUP" when it is displayed.
To set the IP address of the IP-PT
ENTER
Select "Network".
Select "Disable" for DH setting.
ENTER
Select "IP Address".
IP Address*1 ENTER
To set the subnet mask address
Subnet Mask Address*2 Select "Subnet Mask".
ENTER
ENTER
To set the default gateway address (if required)
Default Gateway Address*3 Select "Default Gateway".
ENTER
ENTER
To enter the IP address of the Secondary PBX (optional for KX-NT300 series [Software version 2.00 or later only] and KX-NT500 series [Software version 1.00 or later only])
Return to the Menu screen.
Select "PBX".
ENTER
Select "PBX IP Address".
ENTER
Select "Secondary PBX".
PBX IP Address ENTER
ENTER
To end programming STORE
Return to the Menu screen. *1 *2 *3
The IP-PT will reboot and can then be ed to the PBX.
Press "STORE".
Valid IP address range: "1.0.0.0" to "223.255.255.255" Valid subnet mask address range: "0–255.0–255.0–255.0–255" (except 0.0.0.0 and 255.255.255.255) Valid IP address range: "1.0.0.0" to "223.255.255.255"
Getting Started
41
4.3.1 Asg IP Addressing Information
Note The illustrations may differ from the buttons on your telephone.
42
Getting Started
4.3.1 Asg IP Addressing Information
KX-NT321/KX-NT511/KX-NT551 To start programming
Supply power to the IP-PT. Press PROGRAM while "Searching" is displayed.
To set the IP address of the IP-PT
Select "Network".
Press SP-PHONE.
Select "DH (Disable)".
Press SP-PHONE twice.
IP Address*1 Press SP-PHONE.
To set the subnet mask address
Subnet Mask Address*2 Select "Subnet Mask".
Press SP-PHONE.
Press SP-PHONE.
To set the default gateway address (if required)
Default Gateway Address*3 Select "Default GW".
Press SP-PHONE.
Press SP-PHONE.
To enter the IP address of the Secondary PBX (if required)
Press HOLD to return to the Menu screen.
Select "PBX".
Press SP-PHONE.
Select "PBX IP Address".
Press SP-PHONE.
Select "Secondary PBX".
PBX IP Address Press SP-PHONE.
Press SP-PHONE.
To end programming The IP-PT will reboot and can then be ed to the PBX. Press HOLD twice to return to the Menu screen.
*1 *2 *3
Press STORE.
Valid IP address range: "1.0.0.0" to "223.255.255.255" Valid subnet mask address range: "0–255.0–255.0–255.0–255" (except 0.0.0.0 and 255.255.255.255) Valid IP address range: "1.0.0.0" to "223.255.255.255"
Getting Started
43
4.3.1 Asg IP Addressing Information
Note
• •
For KX-NT511 s For details about operating the PROGRAM button and other buttons, refer to "For IP-PTs" in "4.3.1 Asg IP Addressing Information". To confirm the connection to the secondary PBX after asg IP addressing information, (1) turn the IP-PT’s power off, and (2) hold the STORE button and 2 key while turning the power on.
KX-NT265 (Software version 2.00 or later only) To start programming PROG.
Supply power to the IP-PT. Press PROGRAM while "Searching" is displayed.
To set the IP address of the IP-PT VOL
VOL
Press VOLUME to select "Network".
Press SP-PHONE.
Press VOLUME to select "DH (Disable)".
Press SP-PHONE twice.
IP Address*1 Press SP-PHONE.
To set the subnet mask address VOL
Subnet Mask Address*2 Press VOLUME to select "Subnet Mask".
Press SP-PHONE.
Press SP-PHONE.
To set the default gateway address (if required) VOL
Default Gateway Address*3 Press VOLUME to select "Default GW".
Press SP-PHONE.
Press SP-PHONE.
To end programming HOLD
Press HOLD to return to the Menu screen. *1 *2 *3
•
44
The IP-PT will reboot and can then be ed to the PBX.
Press STORE.
Valid IP address range: "1.0.0.0" to "223.255.255.255" Valid subnet mask address range: "0–255.0–255.0–255.0–255" (except 0.0.0.0 and 255.255.255.255) Valid IP address range: "1.0.0.0" to "223.255.255.255"
Not using a DH server (DH Server feature or an external DH server) when the IP-PT is on a remote office LAN All of the IP addressing information must be assigned manually. Follow the procedure below to assign the IP addressing information.
Getting Started
4.3.1 Asg IP Addressing Information
Note By asg the PBX’s IP address to one IP-PT, it is possible to assign the PBX’s IP address to other IP-PTs or IP-CSs on the same LAN through system programming. For details, refer to "9.14 PBX Configuration—[1-1] Configuration—Slot—V-IPEXT—Port Property—Option— Announce Mode" in the PC Programming Manual.
KX-NT300 series (except KX-NT321) and KX-NT500 series (except KX-NT511 and KX-NT551) To start programming SETUP
Supply power to the IP-PT.
Press "SETUP" when it is displayed.
To set the IP address of the IP-PT
ENTER
Select "Network".
Select "Disable" for DH setting.
Select "IP Address".
ENTER
IP Address*1 ENTER
To set the subnet mask address
Subnet Mask Address*2 Select "Subnet Mask".
ENTER
ENTER
To set the default gateway address
Default Gateway Address*3 Select "Default Gateway".
ENTER
ENTER
To enter the IP address of the PBX For KX-NT300 series: Software version 2.00 or later only For KX-NT500 series: Software version 1.00 or later only
Return to the Menu screen.
Select "PBX".
ENTER
Select "PBX IP Address".
ENTER
Select "Primary PBX".
PBX IP Address ENTER
ENTER
Continued on next page
Getting Started
45
4.3.1 Asg IP Addressing Information
Continued from previous page To enter the IP address of the Secondary PBX (optional for KX-NT300 series [Software version 2.00 or later only] and KX-NT500 series [Software version 1.00 or later only])
PBX IP Address Select "Secondary PBX".
ENTER
ENTER
To end programming STORE
The IP-PT will reboot and can then be ed to the PBX.
Press "STORE". *1 *2 *3
Valid IP address range: "1.0.0.0" to "223.255.255.255" Valid subnet mask address range: "0–255.0–255.0–255.0–255" (except 0.0.0.0 and 255.255.255.255) Valid IP address range: "1.0.0.0" to "223.255.255.255"
Note The illustrations may differ from the buttons on your telephone.
46
Getting Started
4.3.1 Asg IP Addressing Information
KX-NT321/KX-NT511/KX-NT551 To start programming
Supply power to the IP-PT. Press PROGRAM while "Searching" is displayed.
To set the IP address of the IP-PT
Select "Network".
Press SP-PHONE.
Select "DH (Disable)".
Press SP-PHONE twice.
IP Address*1 Press SP-PHONE.
To set the subnet mask address
Subnet Mask Address*2 Select "Subnet Mask".
Press SP-PHONE.
Press SP-PHONE.
To set the default gateway address
Default Gateway Address*3 Select "Default GW".
Press SP-PHONE.
Press SP-PHONE.
To enter the IP address of the PBX
Press HOLD to return to the Menu screen.
Select "PBX".
Press SP-PHONE.
Select "PBX IP Address".
Press SP-PHONE.
Select "Primary PBX".
PBX IP Address Press SP-PHONE.
Press SP-PHONE.
To enter the IP address of the Secondary PBX (if required)
PBX IP Address Select "Secondary PBX".
Press SP-PHONE.
Press SP-PHONE.
Continued on next page
Getting Started
47
4.3.1 Asg IP Addressing Information
Continued from previous page To end programming The IP-PT will reboot and can then be ed to the PBX. Press HOLD twice to return to the Menu screen.
*1 *2 *3
Press STORE.
Valid IP address range: "1.0.0.0" to "223.255.255.255" Valid subnet mask address range: "0–255.0–255.0–255.0–255" (except 0.0.0.0 and 255.255.255.255) Valid IP address range: "1.0.0.0" to "223.255.255.255"
Note
• •
48
For KX-NT511 s For details about operating the PROGRAM button and other buttons, refer to "For IP-PTs" in "4.3.1 Asg IP Addressing Information". To confirm the connection to the secondary PBX after asg IP addressing information, (1) turn the IP-PT’s power off, and (2) hold the STORE button and 2 key while turning the power on.
Getting Started
4.3.1 Asg IP Addressing Information
KX-NT265 (Software version 2.00 or later only) To start programming PROG.
Supply power to the IP-PT. Press PROGRAM while "Searching" is displayed.
To set the IP address of the IP-PT VOL
VOL
Press VOLUME to select "Network".
Press SP-PHONE.
Press VOLUME to select "DH (Disable)".
Press SP-PHONE twice.
IP Address*1 Press SP-PHONE.
To set the subnet mask address VOL
Subnet Mask Address*2 Press VOLUME to select "Subnet Mask".
Press SP-PHONE.
Press SP-PHONE.
To set the default gateway address VOL
Default Gateway Address*3 Press VOLUME to select "Default GW".
Press SP-PHONE.
Press SP-PHONE.
To enter the IP address of the PBX VOL
HOLD
HOLD
PBX IP Address
Press VOLUME Press HOLD to select "PBX". twice to return to the Menu screen.
Press SP-PHONE twice.
Press SP-PHONE.
Press HOLD to return to the Menu screen.
To end programming The IP-PT will reboot and can then be ed to the PBX.
Press STORE.
*1 *2 *3
Valid IP address range: "1.0.0.0" to "223.255.255.255" Valid subnet mask address range: "0–255.0–255.0–255.0–255" (except 0.0.0.0 and 255.255.255.255) Valid IP address range: "1.0.0.0" to "223.255.255.255"
Getting Started
49
4.3.1 Asg IP Addressing Information
For KX-UT Series SIP Phones •
Using a DH server (DH Server feature or an external DH server) to automate the assignment of IP addressing information The DH server automatically assigns the IP address of the SIP phone, the subnet mask address, and the default gateway address to the SIP phone. The PBX’s IP address can also be assigned automatically to the SIP phone in the process of being ed to the PBX. For details about ing the SIP phone, refer to "4.3.2 ing IP Telephones". Note For information about the DH Server feature, refer to "8.1.2 DH (Dynamic Host Configuration Protocol) Server" in the Installation Manual.
•
Not using a DH server (DH Server feature or an external DH server) when asg IP addressing information Only the PBX’s IP address can be assigned automatically to the SIP phone in the process of being ed to the PBX. For details about ing the SIP phone, refer to "4.3.2 ing IP Telephones". The IP address of the SIP phone, the subnet mask address, and the default gateway address must be assigned manually. For instructions, refer to the documentation of the SIP phone. Note
•
•
When the PBX is not in the same network as the SIP phone, the IP address of the PBX must be assigned manually. For instructions on manually setting PBX network information, refer to "Asg the IP address of the PBX to a SIP phone" in "5.7.1 Asg IP Addressing Information" in the Installation Manual. When asg IP addressing information to the SIP phone, do not use the phone’s Web interface programming.
For Non-KX-UT Series SIP Phones •
•
Using a DH server (DH Server feature or an external DH server) to automate the assignment of IP addressing information The IP address of the SIP phone, the subnet mask address, and the default gateway address can be assigned to the SIP phone automatically by the DH server. The PBX’s IP address must be assigned manually on the SIP phone side. For instructions, refer to the documentation of the SIP phone. Not using a DH server (DH Server feature or an external DH server) when asg IP addressing information All of the IP addressing information must be assigned manually. For instructions, refer to the documentation of the SIP phone. Note
• •
50
A SIP phone can only receive IP addressing information from a DH server on its own LAN. Therefore, when SIP phones are located on several LANs, a DH server is required on each LAN. When the DH client function is enabled for SIP phones, simply connect them to the LAN to use the DH server. For details about the DH client function setting, refer to the documentation of the SIP phone.
Getting Started
4.3.2 ing IP Telephones
4.3.2 ing IP Telephones After the programming of the PBX and IP telephones is finished (refer to "4.3.1 Asg IP Addressing Information"), the IP telephones must be ed to the PBX. The procedure for ing IP telephones differs according to the IP terminal registration mode specified during the Easy Setup Wizard. This setting can also be changed in the Site Property—Main screen of the Web Maintenance Console (refer to "9.2.2 PBX Configuration—[1-1] Configuration—Slot—System Property—Site—Main" in the PC Programming Manual). Refer to the following table: IP Terminal Registration Mode IP Terminals Full Automatic Mode
Extension Number Input Mode
Manual Mode
IP-PTs
ü
ü
ü
KX-UT Series SIP Phones
ü
ü*1
ü
Non-KX-UT series SIP phones
ü*2
ü*2
ü
IP-CSs*3
ü
ü: Available *1 *2
*3
KX-UT series SIP phones will be ed automatically, in the same way as Full Automatic mode. Non-KX-UT series SIP phones must always be ed to the PBX manually, even if Full Automatic mode or Extension Number Input mode is selected. IP-CSs must always be ed to the PBX manually. For details about ing IP-CSs, refer to the Quick Installation Guide for the IP-CS.
Notice You can specify an air sync group for IP-CSs after registration only when IP Terminal Registration Mode is set to "Manual Mode". Note
• •
For KX-UT series SIP phones, the SIP extension is automatically set to "1234". For IP softphones, follow the same registration procedure as IP-PTs.
Full Automatic Mode If networking settings have been completed, when IP-PTs or KX-UT series SIP phones are connected to the same network as the PBX, they will be ed automatically. No registration procedure is required.
Extension Number Input Mode For IP-PTs If networking settings have been completed, when IP-PTs are connected to the same network as the PBX, they will be ed automatically, but extension numbers for the IP-PTs will not be set. Follow the procedure below to an extension number to complete registration. 1. After completing networking settings, connect the IP-PT to the same network as the PBX. The screen to enter the extension number is displayed on the IP-PT.
Getting Started
51
4.3.2 ing IP Telephones
2. Enter an extension number. Note When no extension number is entered in this step, the process will time out and the IP-PT will be ed without an extension number.
3. Press [ENTER] on the IP-PT. 4. Press [PAUSE] or "EXIT" on the IP-PT. For KX-UT Series SIP Phones If networking settings have been completed, when KX-UT series SIP phones are connected to the same network as the PBX, they will be ed automatically as same as when they are ed in Full Automatic mode. No registration procedure is required. Note
• •
No more than 64 IP-PTs can extension numbers at the same time. If an extension number that is input for an IP-PT has already been set to another extension, registration by this mode will fail. Note that some extension numbers are pre-configured to other extensions by default. Avoid using such numbers, or delete them before starting the registration process.
Manual Mode For IP-PTs or KX-UT Series SIP Phones After connecting IP-PTs or KX-UT series SIP phones to the PBX over a network, those IP terminals to the PBX manually. Follow the procedure below for registration. 1.
a. Click Setup ® PBX Configuration ® Configuration ® Slot.
b. Place the mouse cursor over the Virtual Slot, and in the menu that appears, click Select Shelf.
c. For IP-PTs: Move the mouse pointer over the V-IPEXT32 card (Virtual 32-Channel VoIP Extension Card). For KX-UT series SIP phones: Move the mouse pointer over theV-UTEXT32 card (Virtual UT Extension Card). A menu will be shown under the mouse pointer. d. Click Port Property. To the IP-PT or KX-UT series SIP phone by entering the MAC address directly:
52
Getting Started
4.3.2 ing IP Telephones
2.
If the Connection column for the port is INS, click INS, and then click OUS on the dialogue box to change the port’s status.
3.
Enter the MAC address of the IP-PT or SIP phone in the IP Phone Registration ID (MAC Address) box.
4.
Click Apply. Once the IP-PT or SIP phone is successfully ed, its status will update to show "ed".
5.
In the Connection column for the port, click OUS, and then click INS on the dialogue box to change the port’s status.
6.
For KX-UT series SIP phones only: Follow the procedure below to change the IP Terminal Registration Mode from Manual to Full Automatic. a. Click Setup ® PBX Configuration ® Configuration ® Slot ® System Property ®Site Property ® Main. b. In the Main tab, select Full Automatic for IP Terminal Registration Mode. c. Click OK.
To the IP-PT or KX-UT series SIP phone using the wizard: 2.
Click Registration. A dialogue box will appear. Non-ed (available) extension numbers and names are displayed on the left.
3.
a. Highlight numbers and names and click the right arrow to select them for registration, and then click Next. b. Click Next. A screen will appear with information on the current IP-PT or SIP phone extension number and name, and index number for programming. Note
•
•
If the IP-PT or SIP phone has been connected to the LAN and power has been turned on, the IP address of the PBX will be assigned automatically. If not, connect the IP-PT or SIP phone to the LAN and turn the power on within 15 minutes after this operation is done. The IP address of the PBX will then be assigned automatically.
c. If the registration is still in progress, the dialogue box will show "Registration Executing". If the registration is successful, the dialogue box will show "Registration Completed". Click Close. Once the IP-PT or SIP phone is successfully ed, its status will update to show "ed".
Getting Started
53
4.3.2 ing IP Telephones
For Non-KX-UT Series SIP Phones After connecting non-KX-UT series SIP phones to the PBX over a network, those IP terminals to the PBX manually. Follow the procedure below for registration. 1.
a. Click Setup ® PBX Configuration ® Configuration ® Slot.
b. Place the mouse cursor over the Virtual Slot, and in the menu that appears, click Select Shelf.
c. Move the mouse pointer over the V-SIPEXT32 card (Virtual 32-Channel SIP Extension Card). A menu will be shown under the mouse pointer. d. Click Port Property.
54
Getting Started
2.
Assign extension numbers to the SIP extensions. • If the Automatic Extension Number Set for Extension Card feature is enabled, the extension numbers of SIP extension are automatically assigned. To programme this feature, refer to "9.35 PBX Configuration—[1-3] Configuration—Option— New Card Installation—Automatic Extension Number Set for Extension Card" in the PC Programming Manual. • If not, enter the extension number for each SIP extension manually.
3.
Set s for the SIP extensions. a. Click the cell in the Connection column for each SIP extension you wish to . The Command Connection screen appears. b. Click OUS. c. Enter a in the box for each SIP extension. d. Click Apply. e. Click the cell in the Connection column for each SIP extension to which a has been assigned. The Command Connection screen appears. f. Click INS. g. Click OK.
4.3.2 ing IP Telephones
Note Alternatively, it is possible to set an extension number as a for each SIP extension automatically.
•
•
4.
In order to set the automatically, do the following in substitution for step c of the procedure above. a. Click Copy to. A screen will appear with information on assigned extension numbers for SIP extensions. b. Click Select All. c. Click Execute to copy each Extension Number to . d. Click Yes. e. Click OK to return to the Port Property screen. When copying extension numbers to s, you can also use the icon on the bottom left of the Virtual SIP Extension Port Property screen.
Programme the SIP extension you wish to .
a. Set the IP address of the PBX, extension number, and in the corresponding fields for your SIP extension. b. Send a request from the SIP extension to the PBX for registration. • If the authentication information of the SIP extension and the PBX match, the registration is successful. Note
•
• •
When programming the SIP extension, the names of the corresponding fields may differ depending on the type of SIP phone you are using. For details about the actual operation of SIP phones, refer to the documentation of the SIP phone. For certain SIP phones, you may need to set a name, which should consist of the extension number and the IP address of the PBX (e.g., [email protected]).
Getting Started
55
4.3.2 ing IP Telephones
56
Getting Started
Section 5 Confirming the Connection
Getting Started
57
5.1 Making and Receiving Calls
5.1 Making and Receiving Calls Making Calls To call another extension You can call another extension ed with the PBX by simply dialling the extension number. extension no. Dial extension number.
To call an outside party
9
outside phone no.
/ 0
Enter automatic line access number.
Dial outside phone number.
Receiving Calls
Off-hook.
58
Getting Started
Talk.
Notes
Getting Started
59
Panasonic System Networks Co., Ltd. 2014
PNQX6310ZA
CC0114AH0
More Documents from "Michael Piaca Gonzales" 1q1a1w
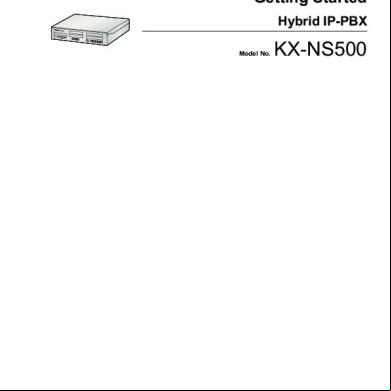
Kx-ns500 66u1v
October 2019 48
780_09914 Zprinter 650 Installation Manual Rev B[1].pdf 1k3p1j
October 2021 0
4p345f
December 2019 433
Linea De Tiempo Promocion De La Salud 6f57m
May 2022 0
Ejercicios Sobre El Cuadro De Boecio 6l6g4d
November 2019 51